Pfeffernüsse is a type of cookie I discovered in a mad dash to beat the crowds out of Grand Central Terminal and make it safely onto the 6:02 to Wassaic one pre-Christmas evening, many Decembers ago. I was cruising past one of the many Zaro’s outlets peppered throughout the station, looking for some kind of pastry or cookie package to bring back to Connecticut with me. (As if lugging two bags of Christmas gifts and my luggage wasn’t enough…) A bag of Pfeffernüsse on the cookie shelf looked interesting, better than bringing back some black & white cookies or another loaf of sourdough bread. My gut feeling was correct. My parents loved them, as did I!

Pfeffernüsse

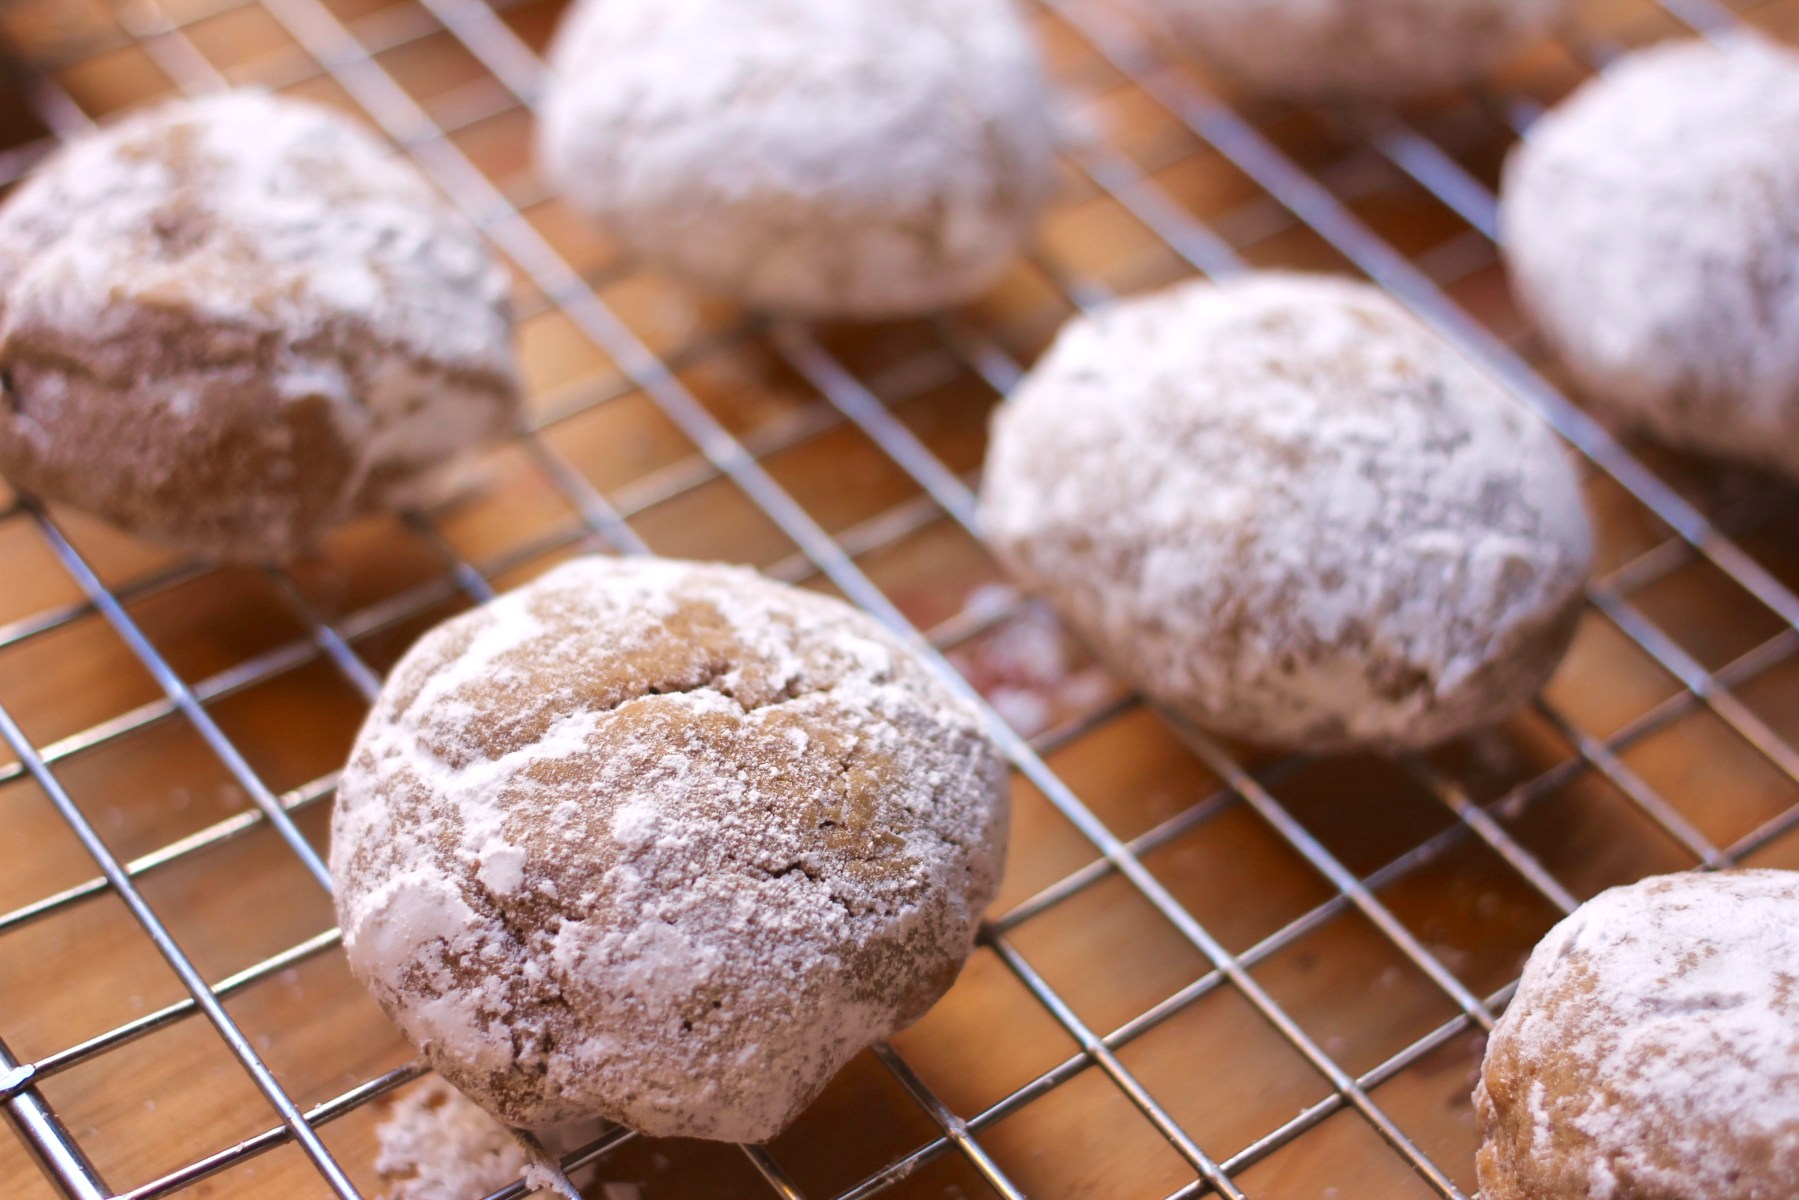
Pfeffernüsse, also known as Pepper Nuts, are a wonderful type of spice cookie. If you are a fan of gingerbread, you’ll love these. Upon first glance, they are rather unassuming. However, the addition of freshly-cracked black pepper, allspice, cloves, and nutmeg will put you into the holiday spirit with just one bite. Some people coat them in powdered sugar after they are baked. Some people don’t. I never plan to be that latter person.

Pfeffernüsse

Also, it’s a wonderful word to say.

Pfeffernüsse

Fey-Fer-NEEEWWWWWWWSE. 

(Sorry, I’m on a bit of a holiday cookie sugar high right now…everything is way too silly…)

Pfeffernüsse

Pfeffernüsse
(Makes 15 – 18 cookies)

Ingredients:

– 2 & 1/2 cups all-purpose flour
– 1 tablespoon ground cinnamon
– 1/4 teaspoon freshly-cracked black pepper
– 1/2 teaspoon ground allspice
– 1/4 teaspoon ground nutmeg
– 1/4 teaspoon ground cloves
– 1/4 teaspoon baking soda
– 1 stick butter, room temperature
– 1 egg
– 3/4 cup brown sugar, packed
– 1/4 cup molasses
– 1/2 teaspoon pure vanilla extract
– 1 cup confectioners’ sugar (for dusting cookies)

Before We Get Started…

– Be sure to have a small paper bag or Ziploc bag to place confectioners’ sugar in. It’ll make dusting the cookies infinitely easier.

Directions:

1.) Preheat oven to 350°F. Lightly grease two baking sheets and set aside.

2.) In a large bowl, combine flour, pepper, cinnamon, allspice, nutmeg, cloves, and baking soda. Set aside.

3.) Place butter, brown sugar, and molasses in a large bowl. Beat with an electric beater on medium speed until mixture is fluffy, about two to three minutes. Once combined, add egg and vanilla and beat until combined.

4.) Slowly add in flour 1/2 cup at a time, beating with electric mixer at low speed. Repeat until all flour is combined and the dough is formed. If mixture is too thick to continue to beat, knead dough together with hands.

5.) Use a tablespoon to scoop out dough and roll into approximately 1″ balls. Place dough balls approximately one inch apart on the prepared baking sheets. Depending on the amount of cookies made and size of the baking sheets, no more than one dozen cookies should be on each sheet.

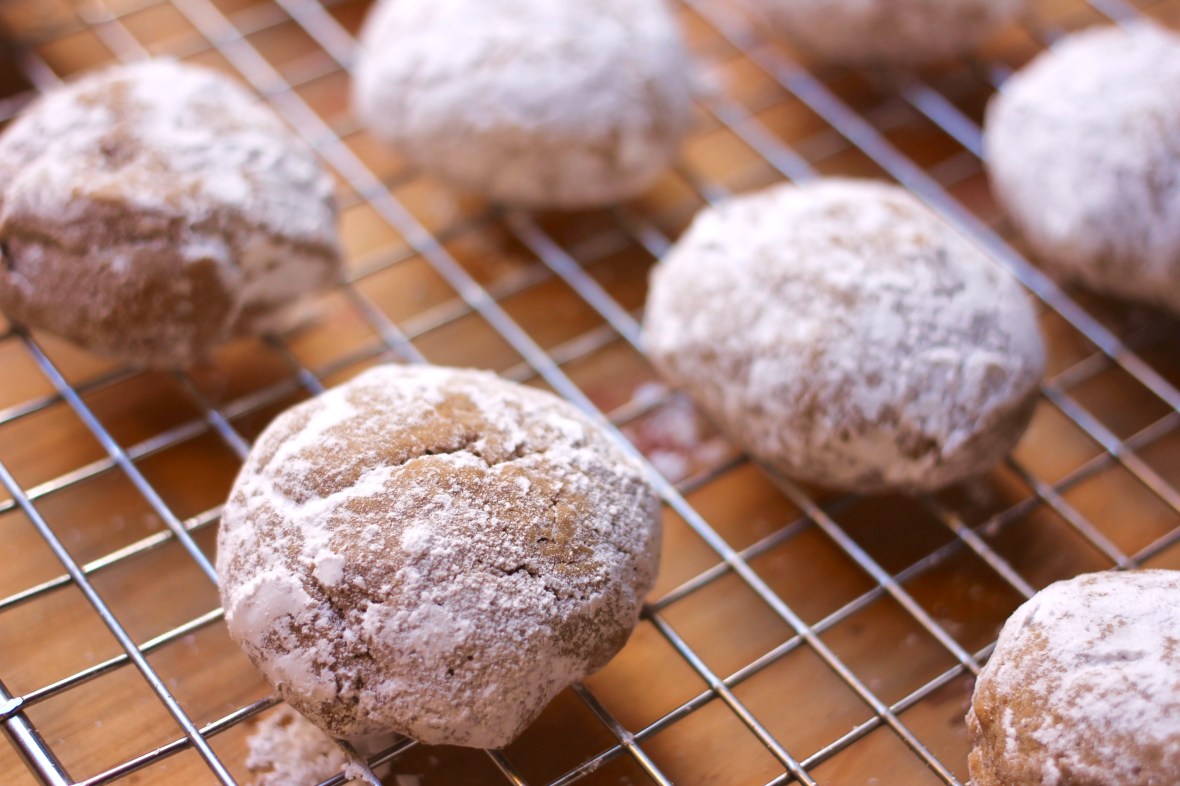
6.) Bake cookies for 15 minutes, rotating sheets seven minutes in. Cookies may crack slightly and should be golden. Transfer cookies to a wire rack to cool for 15 minutes.

7.) Coating three to four cookies at a time, place cookies in bag with confectioners’ sugar. Shake until cookies are well coated. Knock off any excess sugar.

8.) Return cookies to wire rack and allow to cool completely. Store cookies in an airtight container.

Mason Jar Whipped Cream

One morning, while working on my Pumpkin Butterscotch Pie recipe, I decided it needed an accent for when I photographed it for the blog. I have a bunch of different gadgets in the kitchen, but, at this moment, an electric mixer is, surprisingly, not one of them. However, I had about a 1/2 cup of heavy cream in my fridge, and a slew of mason jars a co-worker had gifted me.

mason jar whipped cream

As I shook it in the kitchen early in the morning, one of my roommates came out, saw me shaking, and complimented me on my creation of “Hipster Whipped Cream”.

Hey, it worked like a charm, plus I got in an unexpected arm workout!

mason jar whipped cream

When having a Friendsgiving dinner for a few of my friends recently (because that’s what Millennials do), I made some for a Russian Apple Pie a friend had brought over. Five of us took turns shaking the mason jar, and it was a lot of fun! There are a lot of funny pictures of this on my private Instagram account, for better or for worse.

IMG_5301

Burn some calories to gain some more. Make your whipped cream in a mason jar!

mason jar whipped cream pumpkin pie

Mason Jar Whipped Cream
(Makes 2 cups)

Ingredients:

– 1 cup heavy cream or whipping cream
– 1 teaspoon vanilla extract
– 1 teaspoon sugar (adjust to taste)

Before We Get Started…

– Every mason jar I own is a pint (2 cups / 16 ounces), and I base this recipe off of that dimension. Having half of an empty bottle gives it enough air and space to create a whipped consistency. If you have a larger or smaller jar, adjust ingredients as necessary.

Directions:

1.) Add all ingredients to a mason jar. Seal jar. Shake jar for approximately five minutes or until you no longer hear a sloshing sound when shaking. Serve immediately and refrigerate remains in sealed jar.

Who doesn’t love Green Bean Casserole on Thanksgiving or Christmas?

Well, for years, I didn’t. The idea of dumping a can of cream of [insert vegetable or meat] soup on top of some canned green beans with some crunchy onions on top sounded like an abomination.

Luckily, my culinary prowess has led me to discover that I can cut my own fresh green beans, craft a delicious béchamel sauce, and fry up my own crunchy onions.

green bean casserole

My youngest cousin asked me to make this dish for Thanksgiving this year, but was confused when I said that I made it from scratch. Upon announcing my culinary creation on Facebook, a friend commented that, to paraphrase, I should not “food porn-ize a classic.

green bean casserole

Well, I did. No regrets. This kicks ass and is worth all of the effort.

bechamel sauce

And I think adding bacon to a meal to improve upon it would not be frowned upon by most omnivores.

bechamel sauce

Behold: A Bennington Pottery casserole dish full of love.

green bean casserole

P.S.: My cousins ate this up and the casserole dish was practically licked clean. I think they were thankful that I created it.

green bean casserole

Green Bean Casserole
(Serves 8)

Ingredients:

– 1 & 1/2 pounds (roughly 4 cups) green beans, ends snapped and cut in half

Béchamel Sauce:
– 3 tablespoons butter
– 3 tablespoon flour
– 3/4 cup milk
– 1 cup chicken stock
– 2 strips bacon, crumbled
– 1 ounce cheddar cheese, shredded

Crispy Onions:
– 1/2 large white onion, thinly sliced and rings separated
– 1/4 cup flour
– 2 heaping tablespoons breadcrumbs
– 1 teaspoon garlic powder
– Salt and pepper, to taste
– Canola oil, enough to fill a pan with 1/2 inch of oil for frying

Before We Get Started…

– Though I am normally not one to time the length of my meal creations, this did take me a good 90 minutes from start to finish, as there are many phases to this casserole. Consider this note a friendly heads up to bide your time wisely.

Directions:

1.) Preheat oven to 400°F.

2.) Slice onion and separate rings. Place in cold water for two minutes. Remove and pat dry.

3.) Mix flour, breadcrumbs, garlic powder, salt, and pepper. Dredge onion rings in flour mixture.

4.) Add oil to pan and heat on medium-high. Oil will be ready when shimmering and a drop of water flicks off of the top. Working in batches, place onions in a single layer in the pan; fry for approximately two minutes per batch or until golden brown. Remove with slotted spoon or spatula and drain on paper towels. Set aside.

5.) In a large sauce pan, melt butter on medium-high heat. Add flour and whisk to form a roux. Add milk and whisk until bubbles start to form and mixture begins to thicken. Add chicken broth in a slow steady stream, continuing to whisk. Add cheese and crumbled bacon. Whisk until all ingredients are combined and the mixture coats the whisk. Remove from heat.

6.) In a large sauce pan, add 1/2 cup of water. Add green beans and steam for five minutes or until beans are bright green and crisp. Remove from heat and drain. Combine with béchamel sauce and stir until beans are coated.

7.) Add green beans to casserole dish. Top with onions. If casserole dish has a top, cover with top. Otherwise, cover casserole dish with aluminum foil. Place in oven and cook for fifteen minutes. Remove top and cook for an additional five minutes or until the onions have browned.

8.) Remove from oven and eat immediately!

Pumpkin Pie is a dessert I grew a taste for when I was in college. In yet another edition of “Allison’s Childhood Food Traumas”, I never liked it as a youngster. Why? Because pumpkins were for carving and putting on your front stoop on Halloween. They weren’t for pies! I feel that that rationale from the first eighteen years of my life was valid, yes? Eventually, as I chowed my way through Bay Path’s dining hall in my late teens and early 20s, a slice of pumpkin pie eventually landed on my cafeteria tray, and the rest was history.

pumpkin pie

Currently, I am that horrible person that chastises their beau for not liking pumpkin pie. (SERIOUSLY, Adam? SERIOUSLY?) I have come to absolutely adore the rich caramelized flavor of baked autumn squash inside of a buttery flaky shell. I’m also for upping antes when it comes to some of my dishes, so what harm will a little bit of butterscotch do?

pumpkin pie whiskey

This was my first attempt at making butterscotch, and it is absolutely glorious! I kept tasting the butterscotch as I made this pie, and not all of the alcohol burned off in that process. Who doesn’t love a nice whiskey buzz at noon on a Monday?

pumpkin pie whiskey

The flavors in this pie are absolutely out of this world.

pumpkin pie

And you’ve GOT to top it with homemade whipped cream.

pumpkin pie

I’m pretty sure that’s a national law.

pumpkin pie

Whipped cream. Whiskey. Pumpkin. That’s all one needs to be truly thankful for this time of year! (Well, perhaps family, friends, and good health, too, if you’re feeling ostentatious. 😉 )

pumpkin pie

Pumpkin Butterscotch Pie
(Adapted from Bon Appetit’s recipe for Pumpkin Butterscotch Pie)
(Serves 8)

Ingredients:

– 1 pie crust (homemade or pre-made)
– 3/4 cup light brown sugar, divided into 1/2 cup and 1/4 cup
– 2 tablespoons butter
– 4 ounces whiskey
– 1 cup heavy whipping cream
– 1 cup pumpkin puree
– 3 large eggs
– 1 teaspoon cinnamon

Before We Get Started…

– Have a fine mesh strainer on hand; the harder caramelized bits from the butterscotch need to be strained through.

– If you are creating a homemade crust for this recipe, it must be blind baked. The Kitchn provides a helpful lesson on blind baking.

Directions:

1.) Preheat oven to 350°F.

1a.) If you have a pre-made pie crust, set aside. If you are creating a homemade pie crust, prepare crust according to your directions. (See note in Before We Get Started… regarding blind baking.) Once baked, set aside.

2.) To create butterscotch – In a medium saucepan, melt butter. Add 1/2 cup brown sugar and stir until combined. Cook over medium heat for approximately five minutes or until mixture takes on a dark brown color. Remove from heat. Add whiskey and cream; expect the mixture to quickly bubble. Whisk to combine; don’t be worried if the mixture seizes up a little! Return to heat and cook mixture on medium until smooth and caramelized bits have dissolved. Strain mixture into a large bowl. Set aside and allow to cool to room temperature.

3.) In a large bowl, combine pumpkin puree and 1/4 cup brown sugar. Add eggs and cinnamon. Whisk all ingredients until combined.

4.) Add butterscotch to pumpkin mixture and whisk until combined.

5.) Add mixture to pie crust and bake for approximately 50 minutes or until the pie has just set.

6.) Cool for at least three hours before serving.