There is little in this world I love more than cheese. It is the singular reason I will never become vegan. I could give up every other animal product in the world, but I need Cabot to survive. If you were to come into my apartment right now and look in my fridge, you’d see block after half-eaten block of cheddar cheese, in various stages of consumption. I’m positive that I go through cheese withdrawal if I don’t eat it at least once a day.

My love of richer cheese surprised my parents. There is a famous story that my mother loves to tell: When I was six, my parents and I took a trip to Washington, D.C. to visit one of her sisters, my Aunt Kim; she lived near Capital Hill at the time. Near Union Station, my parents found a small restaurant, and they ordered baked brie with roasted garlic and toast. I still vividly remember it being a very warm April day, 1991, partly cloudy, cherry blossoms blooming, dining al fresco. I remember devouring toast after toast, loaded with Brie and garlic. Years later, my parents recounted their side of the story to me: They ordered the baked Brie because they thought I would hate it, and to their surprise and odd disappointment, I loved it! The disappointment developed because they didn’t get to eat as much of it as they would have liked to.

Sorry, Mama and Papa. When you expected my childhood food finickiness to work to your advantage, I pulled a 180 on ya.

Brie French cheese

In the past few years, I’ve come across Brie and other soft cheese at regular intervals. I used to enjoy it simple baked and smeared on a cracker. Lately, I’ve learned to incorporate it into my cooking; puff pastry filled with cinnamon-roasted apples and Brie is a particular favorite of mine. (Said recipe may come at a later juncture…) I’ve come across it incorporated into grilled cheese sandwiches and burgers at many French-influenced restaurants around Manhattan. With such a buttery texture and pungent (enough) flavor, I thought it may pair well with a cream-based soup.

IMG_5734

Well, lo and behold. Who knew roasted cauliflower and Brie would marry so happily inside of a soup bowl?

IMG_5751

Well, my intuition did.

IMG_5754

She’s pretty on the ball, I must say…

IMG_5757

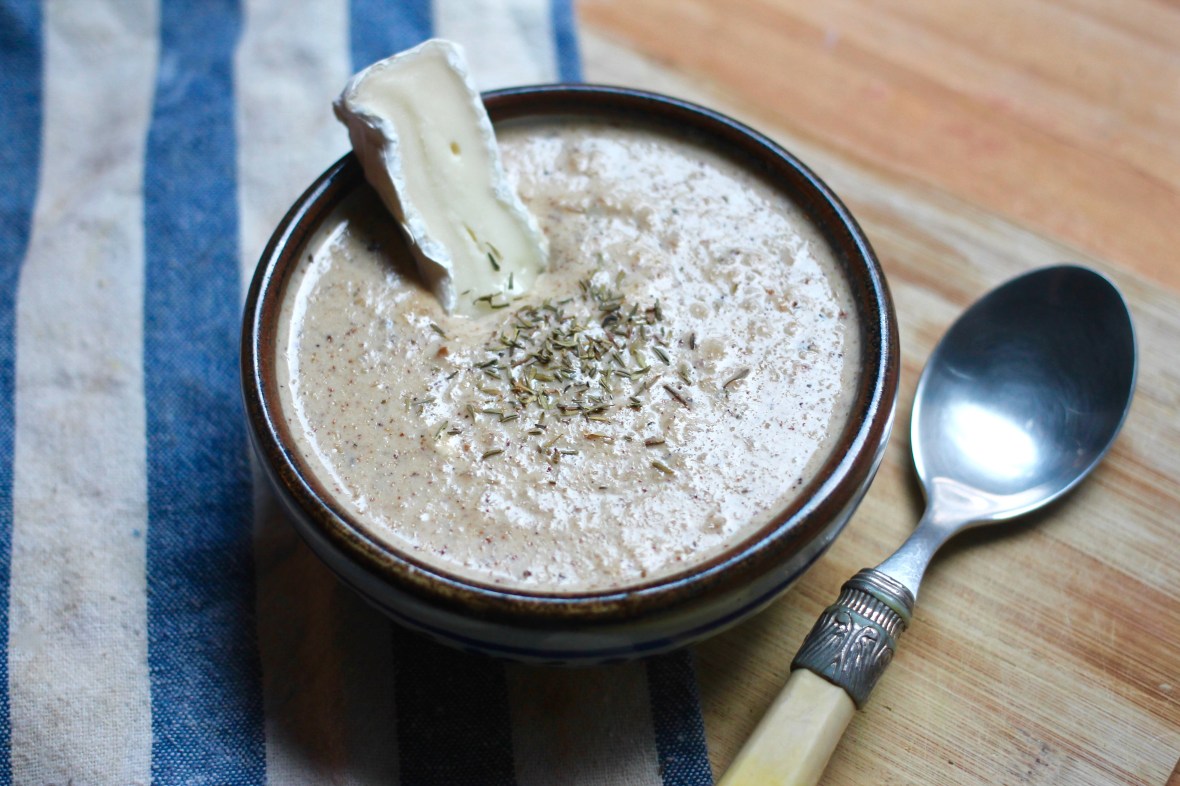
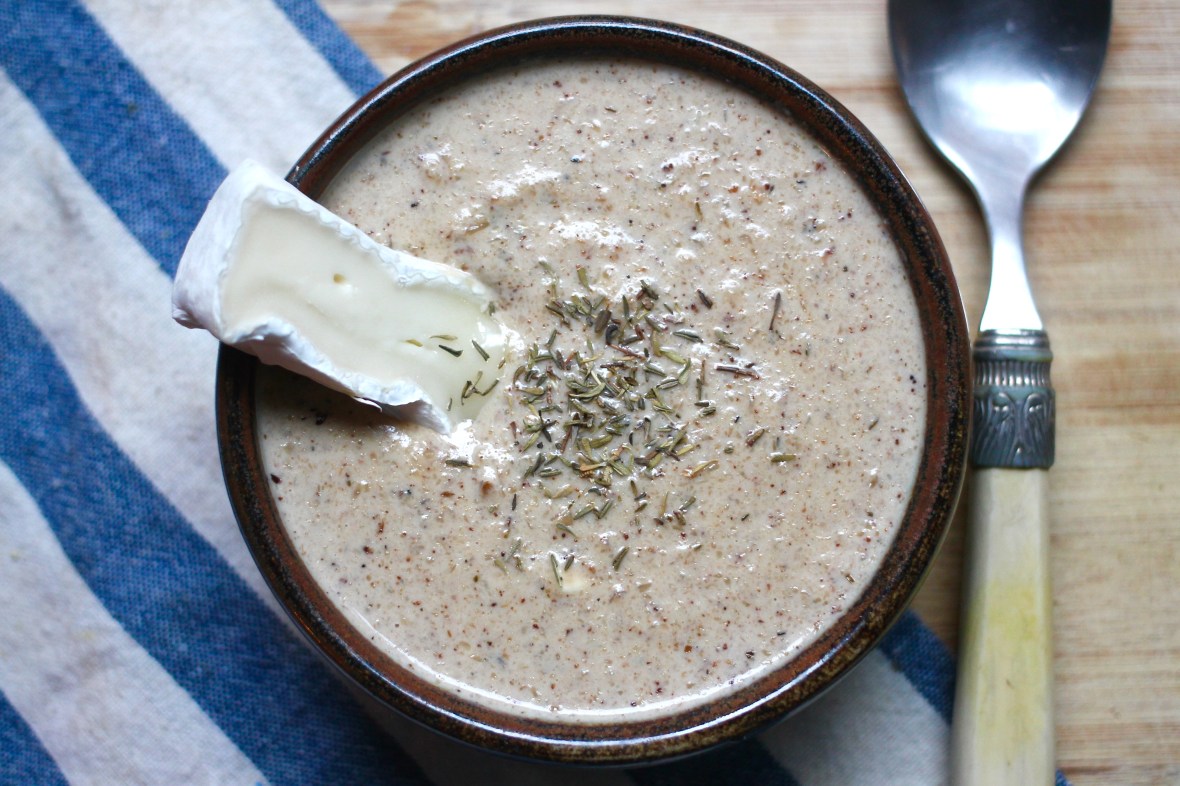
Roasted Cauliflower Brie Soup
(Serves 4 – 6)

Ingredients:

– 1 head of cauliflower (roughly 8 cups), chopped
– 1 medium white onion, roughly chopped
– 2 cups whole milk
– 1/4 cup heavy cream
– 3 cups vegetable broth
– 1 cup water
– 6 ounces Brie, rind removed and diced
– 6 cloves garlic, in tact and with skin on
– 2 tablespoons olive oil
– 1 teaspoon garlic powder
– 1 teaspoon dried or fresh thyme, finely minced
– Salt and pepper, to taste

Before We Get Started…

– To ensure even roasting, spread cauliflower across multiple baking sheets if one singular baking sheet is not large enough.

– If using a standing blender to blend the soup, do it in small batches; blending hot soup in large quantities can lead to an overflow and possible injury. (Or, at the very least, you might inadvertantly paint your walls with some delicious soup.)

Directions:

1.) Preheat oven to 400°F.

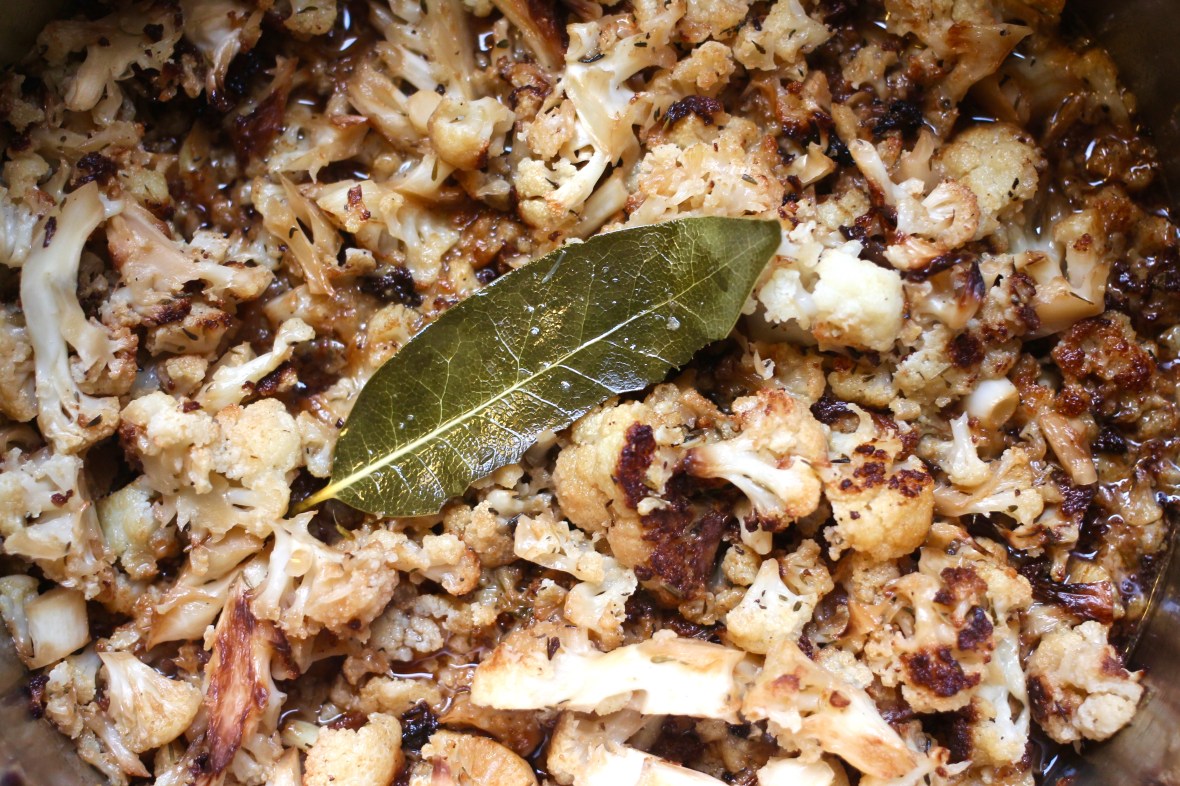
2.) In a large bowl, combine cauliflower, olive oil, thyme, and garlic powder. Toss until cauliflower is coated. Spread cauliflower in an even layer across baking sheet(s). Cut the ends off of garlic cloves, drizzle in olive oil, and place on baking sheet. Roast cauliflower and garlic for 25 – 30 minutes, making sure cauliflower is turning light brown in spots but is not entirely roasted through.

3.) In a four quart saucepan, add vegetable broth, water, and chopped onion. Bring to a boil then reduce to a simmer for 10 minutes. Remove onion and discard.

4.) Remove skins from garlic and squeeze roasted garlic onto roasted cauliflower. Add cauliflower, garlic, and bay leaf to saucepan. Simmer for approximately 30 minutes or until cauliflower is tender. Remove bay leaf and discard.

5.) Blend soup using either an immersion blender in the sauce pan, or blend in batches using a standing blender. (See note in Before We Get Started… regarding blending hot soup in a standing blender.) If using a standing blender, return soup to the sauce pan when finished.

6.) Return soup to a simmer. Add milk, cream, and Brie and stir until combined and Brie has melted and thoroughly combined with the soup. Add salt and pepper to taste.

7.) Remove soup from heat and serve immediately, topping with thyme leaves, if desired. If storing leftover soup in the refrigerator or freezer, allow soup to come to room temperature before storing in containers.

I’m trying to recall why I was ever intimidated by making scones. For years, I was. I’m racking my brain, trying to figure out that exact rationale; on the whole, I just recall being told that they are easy to mess up. There is a fine line between making a batch that is moist enough but not too dry, as the hallmark of a good scone is a slight crumble. For Christmas 2014, I took a leap of faith and whipped up a batch of cranberry scones at 7 that morning, feeling inspired yet nervous. I was worried that my failure in making edible ones would result in ruining such a precious day for my family. (Dramatic, much?) The integration of the cold butter was a bit cumbersome, and I hazily recall asking one of my parents to scrape the dough off of my hand at one juncture. However, 30 minutes later, we were happily munching on scones that were dense yet not overwhelming, crispy but not dry, and bursting with juicy cranberries.

I could handle scone making.

I make them rarely, but I love to experiment when I do. (Note: Roasted Grape Scones will show up on this site sooner than later!) I find it hard to make a smaller recipe because, one, I don’t always feel like doing the math to halve or third it (…lazy…), and two, I love sharing them with roommates, friends, and co-workers. In fact, one of my co-workers has one scone recipe down to a science. Hers, with a traditional smattering of currants, are everything a quintessential scone should be. In fact, they inspired a hashtag you may seen on my Instagram feed on days I’m lucky enough to eat her baked goods: #dammitjeanmarie. However, she is a self-admitted purist; she has told me that the only filling within a scone should be currants. I respect that, so I’ll let her make hers, and I’ll allow myself to go the more experimental route. At least we aren’t competing. Ha!

IMG_5768

Oh, and I learned a cool trick from my father a few months back. When it comes to certain desserts, you may see an instruction that strikes fear in the hearts of many: cutting butter into flour. Growing up, I never had a pastry cutter; I had my hands and my fingers! I do remember attempting to slam a whisk into a chunk of butter many a year ago, and the results of that were as follows: the butter got pushed into the middle of the whisk and I had to fish it out. I thought the use of the whisk as a makeshift pastry-cutting instrument was ingenious, but…yeeeeah. Hindsight was 20/20. I went back to my hands and fingers after that. When I was home in Connecticut this past October for my birthday, my dad made my favorite dessert: apple crisp! Of course, he tops with with a flour and butter-based brown sugar crumble. As I watched him make it, I noted how he had a frozen stick of butter and a cheese grater. I was intrigued. What did he do? He grated the frozen butter! It made its incorporation into the flour and brown sugar much simpler. Ahhh, my father, the culinary genius…

IMG_5719

Cheers to Monday, y’all! Pop a scone to get you though this morning.

IMG_5770

Orange Ginger Scones
(Makes 8)

Ingredients:

– 2 & 1/4 cups all-purpose flour
– 1/3 cup sugar
– 12 tablespoons (1 & 1/2 sticks) butter, cubed or shredded while frozen
– 1 tablespoon baking powder
– 3/4 cup heavy cream, plus 2 tablespoons, divided
– 1 teaspoon orange zest
– 1 tablespoon freshly-squeezed orange juice, plus 1 teaspoon, divided
– 3/4 cup candied ginger, finely chopped
– 2 tablespoons turbinado sugar

Before We Get Started…

– Be prepared: when mixing this dough with your hands, it is exceedingly sticky!

Directions:

1.) Preheat oven to 400°F.

2.) In a large bowl, combine flour, sugar, orange zest, and baking powder. Whisk thoroughly to combine.

3.) Add butter to dry ingredients; mix with hands or a pastry cutter until the mixture is crumbly and mealy. Form a well in the middle of the mixture and add 3/4 cup of heavy cream and 1 tablespoon freshly-squeezed orange juice. Use hands to combine mixture until all ingredients are incorporated.

4.) Turn dough onto a floured surface and lightly knead for no more than 30 seconds. Form dough into a rough shape, approximately 10 inches in diameter. Cut into 8 triangular slices.

5.) Place scones on parchment paper-covered baking sheet. Combine two tablespoons of heavy cream and 1 teaspoon freshly-squeezed orange juice. Brush tops with cream mixture and sprinkle with turbinado sugar. Bake for 14 – 16 minutes, or until tops are lightly browned and slightly cracked.

6.) Place on wire rack to cool before eating. Store remaining scones in an airtight container.

Schaum Tortes

December 2020 Update

During a holiday season that’s going to be just plain…well…WEIRD…I’m finding comfort in creating old holiday recipes. (What are we calling it? #CovidChristmas ? #PandemicHolidays ? Someone tell me the appropriate levity-heavy hashtag here!) I’m pulling this gal out of the archives for public consumption, because we could all use a few holiday recipes to lift our spirits nowadays.

When it comes to Schaum Tortes, something about the crispness – yet- toothsomeness of my grandmother’s recipe will always transport me back to Christmas Eves of my youth, drowning them in whipped cream and sliced strawberries while my cousins and I horsed around away in their basement while watching holiday episodes of “All That” and playing ping-pong.

I hope you enjoy this recipe for schaum torte, as well as a few old antiquated pictures and a torte that could have been saved – from a photographic point of view – if only I had remembered to add whipped cream to it before photographing it. HA!

Schaum Torte 2020! 😆☁️🍓🎄

From the Original December 24th, 2015 Posting:

Schaum Tortes were a staple of my Christmas Eves growing up. My paternal grandmother, Mamie, would whip up these crunchy yet pillowy meringues and serve them with sliced strawberries and fresh whipped cream. My cousins and I would plop into the dense black leather couches in her living room, munching away and watching Christmas shows on SNICK while our parents, grandparents, aunts, and uncles would do their boring adult stuff. (In hindsight, what they did then is likely what I enjoy doing now: just sitting around and talking about things that matter.)

My grandmother unexpectedly passed away a few days after Christmas in 2008. Ever since then, Christmas has always, well, been a bit of a downer for me. Not that I spend my holidays weeping, but I always think of Mamie more often than not. However, regardless of how bummed I may feel, I’m always one to try and make myself, and those around me, happy.

This year, with Mamie on my mind, I decided to give Schaum Tortes a try.

schaum tortes

Schaum Tortes translates into “foam cakes” from German, and some research on their origin lead me to find that they are popular amongst Wisconsinites of German origin. Well, Mamie was a Wisconsinite of German origin, so that makes a hell of a lot of sense now! Ha!

schaum tortes

Many people find Schaum Tortes similar to Pavlova, their Russian equivalent. Their crisp outsides yield a pillowy meringue inside; it melts in your mouth like spun sugar. Schaum  Tortes must be served with sliced strawberries and fresh whipped cream. It’s a rule! (Though, admittedly, I’m a sucker for Reddi Whip and that’ll NEVER change.)

schaum tortes

I’m struck with a bit of nostalgia at this moment.

schaum tortes

Cheers, Mamie. I hope I did you proud with these Schaum Tortes…even if I overcooked the first batch I made. Haaa.

schaum tortes

Schaum Tortes
(Makes 4 medium tortes, perfect for an ample single serving)

Ingredients:

  • 3 egg whites
  • 1/2 teaspoon cream of tartar
  • 1/2 tablespoon white vinegar
  • 1 cup sugar
  • 1/2 teaspoon vanilla extract

For Serving:

  • 1& 1/2 – 2 cups sliced strawberries
  • 1 & 1/2 cups whipped cream

Before We Get Started…

– When separating egg whites, be sure no yolk mixes in. Even the smallest amount of yolk will not allow a proper meringue to form.

Directions:

1.) Preheat oven to 275°F.

2.) In a large bowl, use an electric mixer to beat egg whites until they are foamy, approximately 30 seconds.

3.) Add cream of tartar and vinegar to egg whites; beat until soft peaks form, approximately 3 – 5 minutes.

4.) In increments, add sugar to bowl, continuing to beat until all sugar is combined. Add vanilla extract. Beat until stiff peaks form.

5.) On a lightly greased or parchment paper-covered baking sheet, divide meringue mixture into four tortes, slightly denting the middles with a spoon and building up the sides to form a shallow well.

6.) Bake in oven for 45 – 50 minutes; turn off heat and keep tortes in oven, door closed, for an additional 45 – 60 minutes.

7.) Remove from oven and place on wire racks to cool. Serve with sliced strawberries and whipped cream.

Rosemary Beet Chips are a wonderfully light holiday snack. They hold those gorgeous red and green hues we all associate with Christmas, yet don’t add too much bulk to our waistlines.

rosemary beet chips

I’ve been scanning through Instagram the past few days, looking namely at many of the “healthy” food blog accounts I follow. Many people are able to maintain good eating habits year round, even during the holidays, when temptation lies at every corner. Some people were doing the 21 Day Sugar Detox Diet after Thanksgiving. Others have been sticking to protein smoothies and kale salads.

In the past 24 hours, all I’ve consumed a bowl of meaty chili with cheese and sour cream, a Bananas Foster Milkshake from Big Daddy’s, a slice of white pizza, and a 20 ounce cup of hot cocoa.

It’s Christmas Week. All bets are off.

rosemary beet chips

Still, some beets will keep me in good standing somewhere along the line. Just the knowledge that I’ve consumed a vegetable, even though it’s been baked half to death, makes me feel balanced.

rosemary beet chips

January will be here soon enough. I’m repent then, along with everyone else, at least for a few weeks.

rosemary beet chips

Rosemary Beet Chips
(Makes 1 personal-sized serving)

Ingredients:

– 1 medium to large beet, scrubbed
– 1 – 2 sprigs of fresh rosemary, minced
– 1/2 teaspoon garlic powder
– 2 tablespoons olive oil
– 1/2 teaspoon sea salt

Before We Get Started…

– Cutting beets = do not wear white or light-colored clothing! Also, be prepared for a nice red hue on your fingertips. Beet juice is an effective dye.

– Keep on eye on your chips. Depending on their thickness, they may cook in as little as 7 minutes. If cutting on a mandolin, I’d suggest keeping it on a higher setting for a slightly thicker chip. Paper thin chips will crisp and burn too quickly.

– Don’t be alarmed when the chips end up smaller after cooking! They will shrink.

Directions:

1.) Preheat oven to 375°F. Lightly grease or place parchment paper on two baking sheets. Set aside.

2.) Slice beet into thin uniform slices with a mandolin or a sharp knife.

3.) Combine oil, rosemary, and garlic powder in a small bowl.

4.) Place slices on baking sheets. Lightly brush or drizzle rosemary oil mixture onto beet chips, covering them but not saturating them. Sprinkle salt on beet chips.

5.) Place in oven and bake up between 10 – 15 minutes. (Please see note regarding cooking times in Before We Get Started…)

6.) Remove from oven; place on paper towels to drain any excess oil.

7.) Eat immediately or store in airtight container.